User Management
The Users page is where you manage every person who has access to your IntelliSales CRM instance. From here you can create accounts, assign roles and departments, deactivate departing employees, and monitor user activity.
Users List
Navigate to Admin > Users to see the full user table.
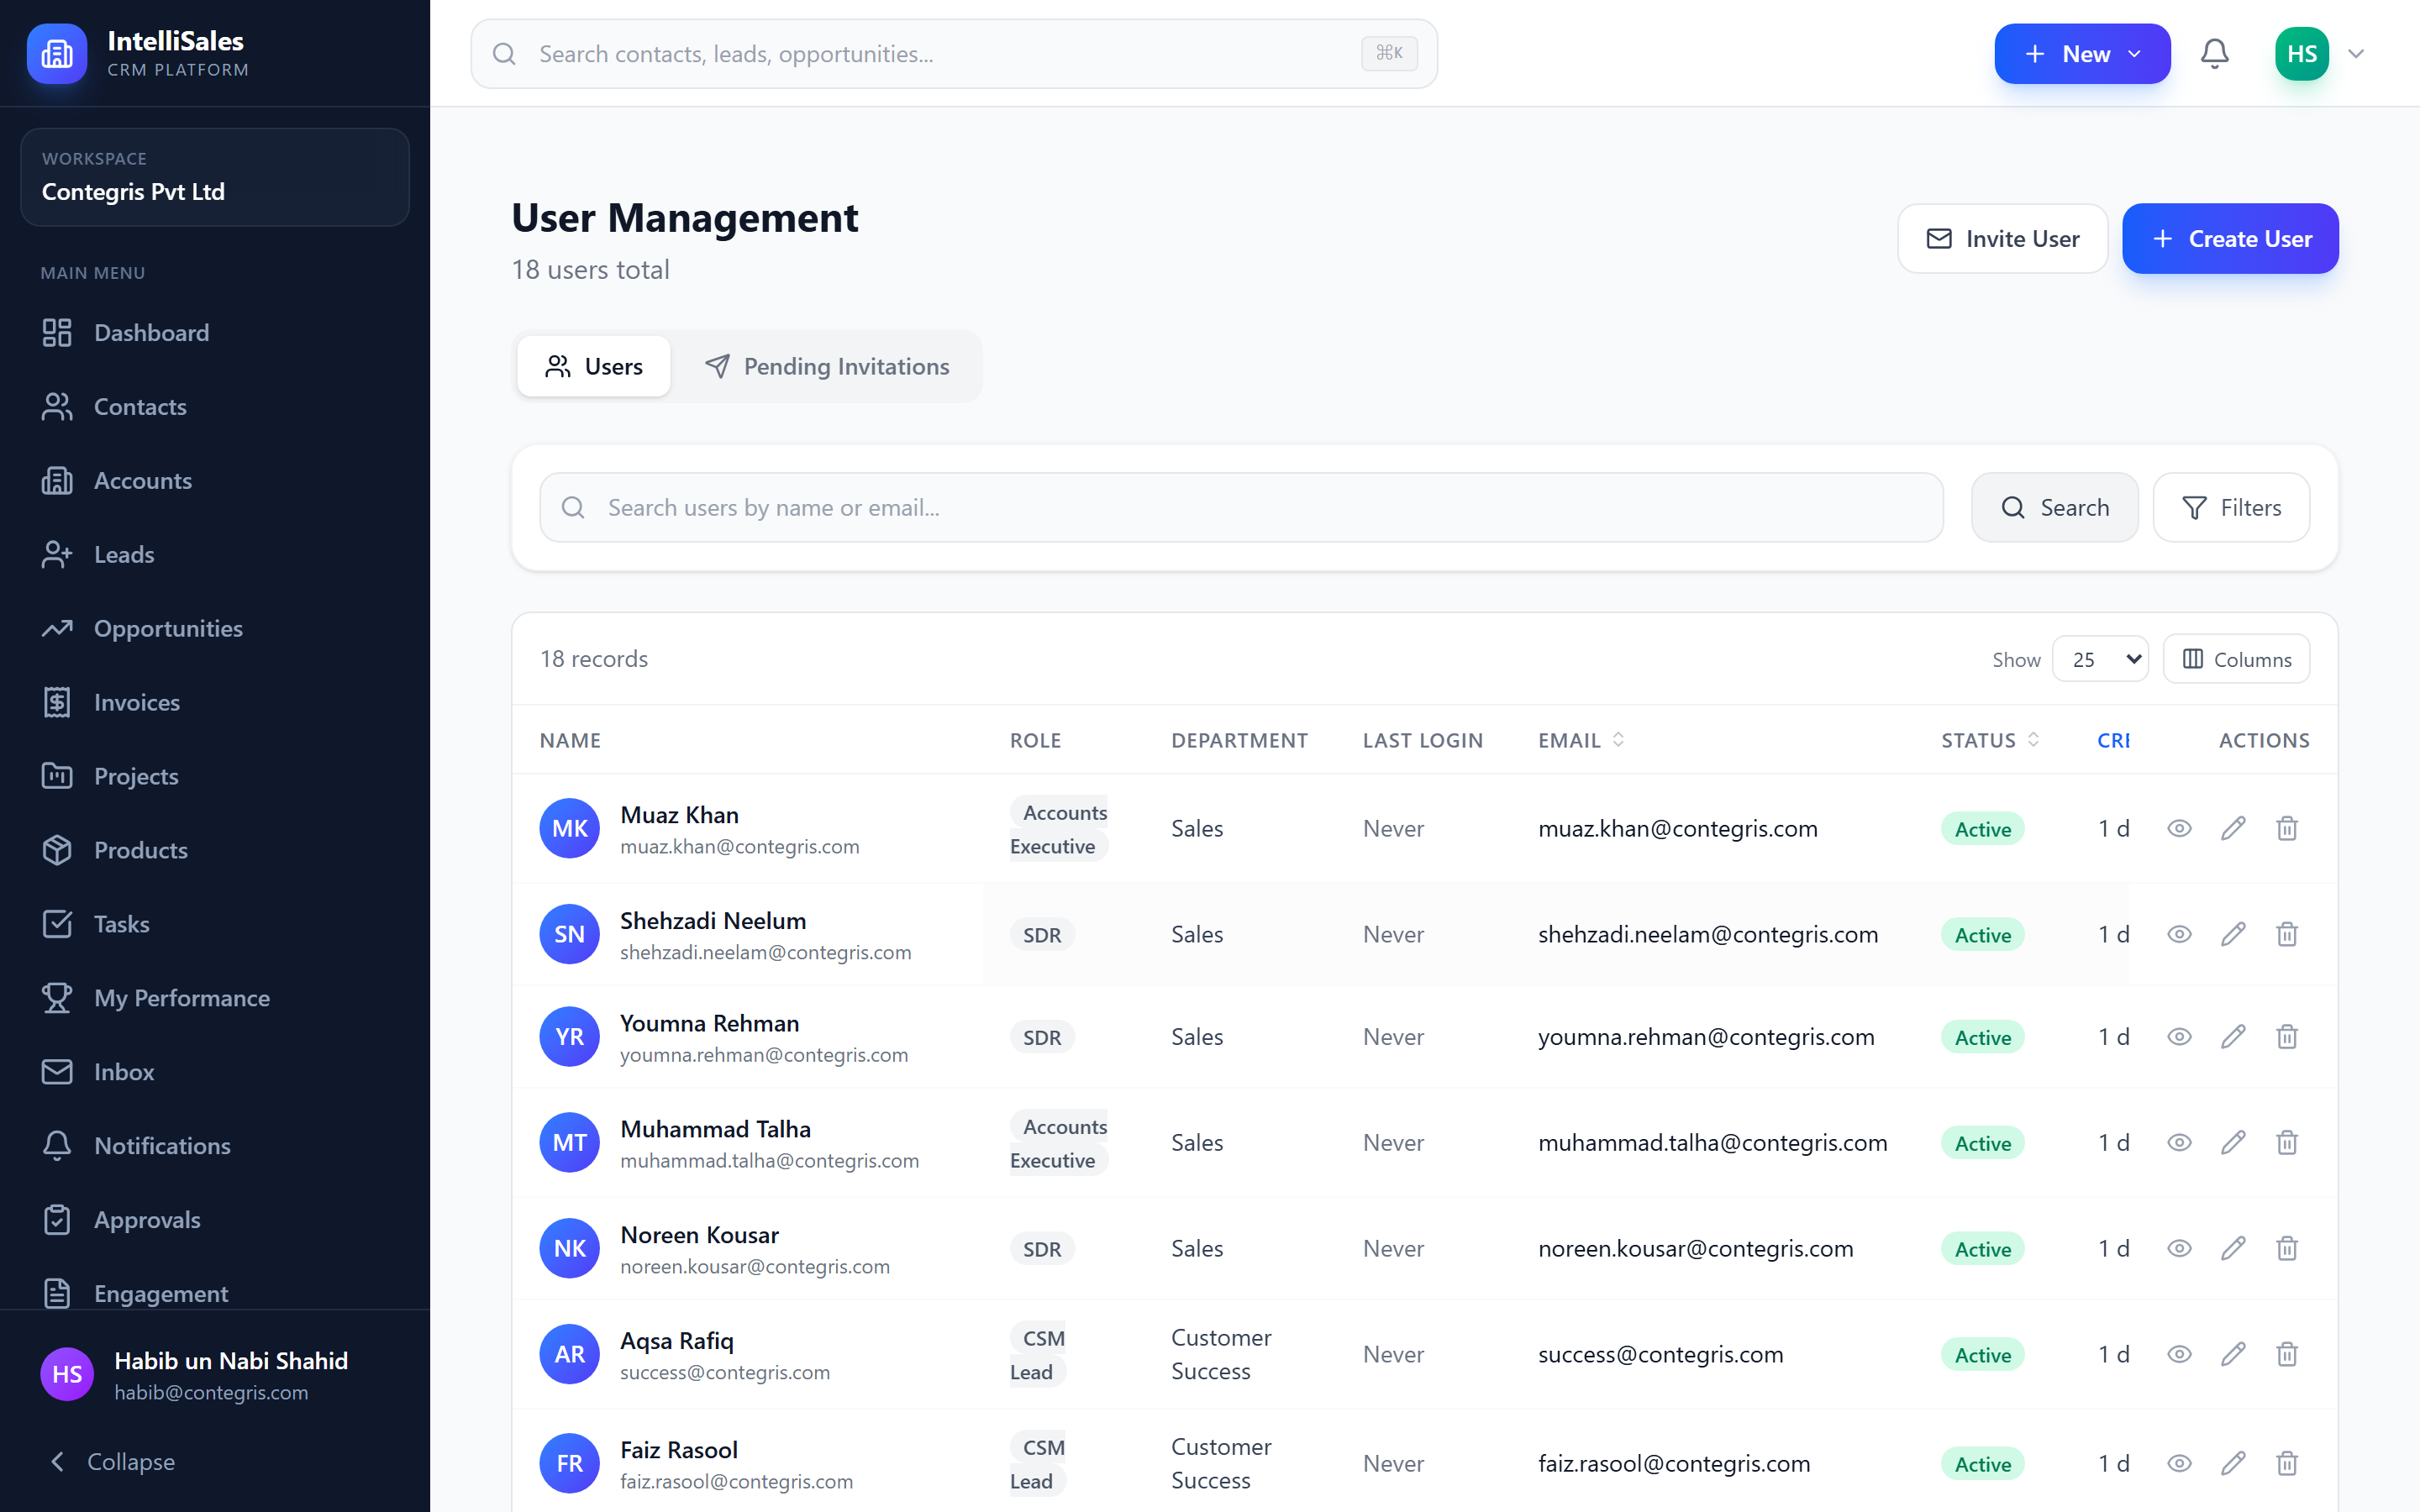
The table displays:
| Column | Description |
|---|---|
| Name | Full name with avatar |
| Login email address | |
| Role | Assigned RBAC role (Admin, Manager, User, or custom) |
| Department | Primary department assignment |
| Status | Active or Inactive |
| Last Login | Timestamp of most recent authentication |
Searching and Filtering Users
- Search bar — Type a name or email to filter the list in real time.
- Role filter — Select a role from the dropdown to show only users with that role.
- Department filter — Filter by department.
- Status filter — Toggle between All, Active, and Inactive users.
Combine filters to quickly find users. For example, filter by "Sales" department and "Inactive" status to find former sales reps.
Creating a User Directly
- Click the Add User button in the top-right corner.
- Fill in the required fields:
- First Name and Last Name
- Email — must be unique across the tenant
- Password — minimum 8 characters; the user can change it later
- Role — select from existing roles
- Optionally assign:
- Department
- Team(s)
- Manager (direct report relationship)
- Phone number
- Job title
- Click Create User.
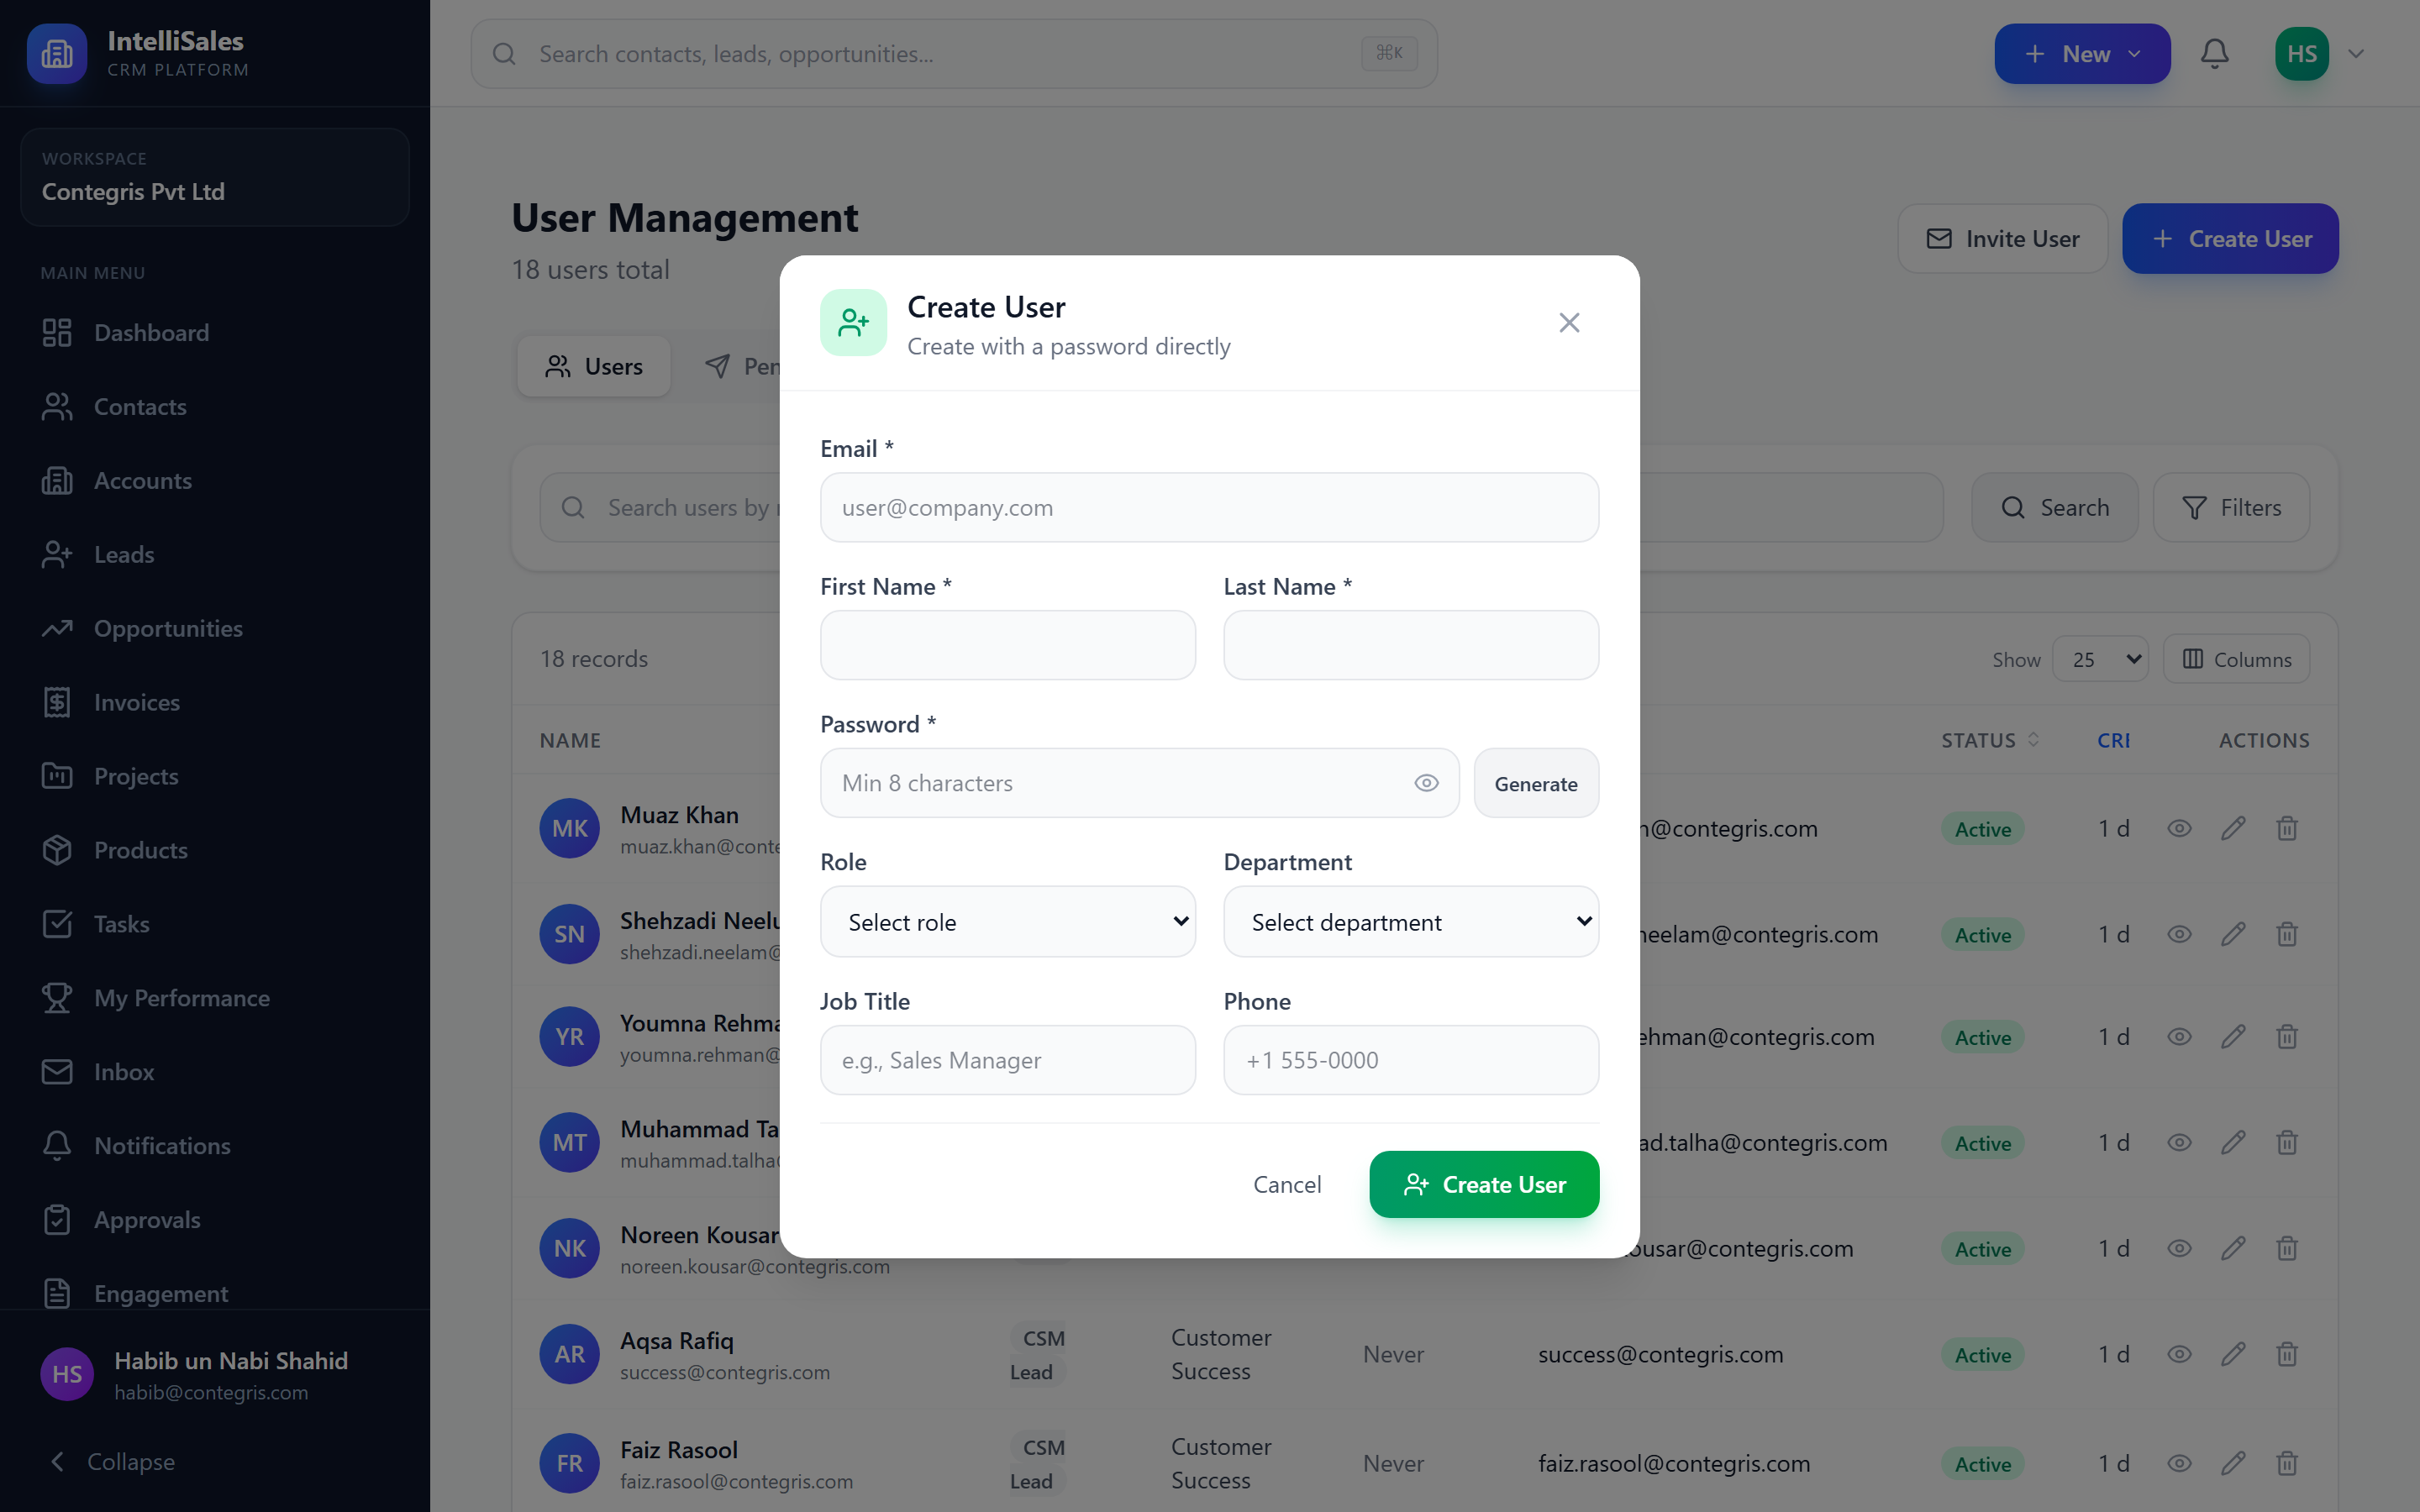
Creating a user directly sets their password immediately. For a more secure onboarding flow, use Invitations instead, which lets the user set their own password.
Editing User Profiles
- Click on a user's name in the list to open their profile.
- Modify any of the following:
- Role — changes take effect on the user's next API request (JWT refresh)
- Department — affects record access scoping
- Team assignments — add or remove team memberships
- Manager — sets the reporting line (used for org chart and reporting_line scoping)
- Job title, phone, profile picture
- Click Save Changes.
Role and department changes affect the user's permissions immediately after their JWT token refreshes (typically within minutes). For an immediate effect, ask the user to log out and back in.
Granting Settings access without sysadmin
The admin and settings modules are separate in the permission matrix — you can give a role settings.view / settings.edit (or admin.view / admin.edit) without bumping them to sysadmin level 100. They'll see the Administration section in the sidebar gated per-module, and settings pages behave in view-only mode (banner + every input disabled) when the role has only the view actions.
See Roles & Permissions → admin vs settings for the full matrix.
Deactivating vs. Deleting Users
IntelliSales CRM uses soft deactivation rather than hard deletion for user accounts.
| Action | What Happens |
|---|---|
| Deactivate | User cannot log in. All their records, history, and audit trail are preserved. The user disappears from active assignment dropdowns. |
| Delete | Not available through the UI. User records must be preserved for audit compliance. |
To Deactivate a User
- Open the user's profile.
- Click the Deactivate button (or toggle the status switch).
- Confirm the action in the dialog.
- The Transfer ownership dialog appears next — pick the user who should inherit the open records. The deactivation only completes after the transfer succeeds.
Transfer Owned Records on Deactivate / Delete
The deactivation flow now bundles an atomic transfer of every record owned by the user — so no records are left orphaned. The transfer covers:
| Entity | What moves |
|---|---|
| Leads | owner_id reassigned. |
| Opportunities | owner_id reassigned. |
| Contacts | owner_id reassigned. |
| Accounts | owner_id reassigned. |
| Tasks | owner_id and assigned_to reassigned. |
| Projects | owner_id reassigned. |
| Subscriptions | owner_id reassigned. |
| Booking forms | Host reassigned to the new owner. |
The whole transfer runs inside a single Postgres transaction — if any step fails, the deactivation is rolled back and no records are moved, so you never end up half-migrated.
If you want to leave specific records with the deactivated user (e.g., a salesperson moving to a different role but keeping historical accounts), reassign those first using bulk operations, then deactivate.
To Reactivate a User
- Filter the users list to show Inactive users.
- Open the inactive user's profile.
- Click Activate (or toggle the status switch back on).
- The user can log in again with their existing credentials.
Exclude from Lead Assignment
This flag ships with migration 078. Run npx ts-node apps/api/src/scripts/run-tenant-migrations.ts to apply.
Some users sit on a sales team for visibility (managers, finance reviewers, ops) but should never have inbound leads routed to them. Open the user's profile and tick Exclude from lead assignment.
When a workflow assign_owner action resolves a pool of leads — whether the pool is a hand-picked user list, a team, or all_active — these users are filtered out before the routing algorithm runs. Round-robin, weighted, load-based, territory, skill match, and sticky all honour the flag.
The flag only affects leads routing. Opportunity, contact, and account workflows still see the user as a valid assignee.
Self-Access for Profile & Availability
Users can now view and edit their own profile and their booking availability without the users:view permission — meaning a sales rep can adjust their availability for a booking page without an admin grant. The change only opens up "own user" access; viewing other users still requires users:view per RBAC.
Manager Assignment and Direct Reports
Each user can have a Manager field set, which builds the reporting hierarchy used for:
- The Org Chart visualization
- Reporting Line record access scoping (see Record Access)
- Target cascading from managers to their reports
To view a user's direct reports, open their profile and scroll to the Direct Reports section.
Viewing User Activity
The user profile includes an Activity tab showing:
- Recent login timestamps
- Records created/modified count
- Tasks completed
- Pipeline activity summary
This helps administrators monitor engagement and identify inactive users who may need follow-up or deactivation.
Best Practices for User Lifecycle
- Use invitations for new hires — it is more secure than setting passwords manually.
- Assign roles before departments — the role determines what the user can do; the department determines what they can see.
- Set managers early — the org chart and reporting line scoping depend on this relationship.
- Deactivate promptly when employees leave — do not leave stale active accounts.
- Reassign records first — before deactivating, use bulk reassignment to transfer ownership of open items.
- Review inactive users quarterly — audit the inactive list and clean up any accounts that should be fully removed from reporting.
Next: Inviting Users — The recommended way to onboard new team members.