Lead Settings
The Lead Settings page is the central hub for configuring your lead management process. It contains 7 tabs covering every aspect of lead handling from initial capture to qualification.
Navigate to Admin > Lead Settings.
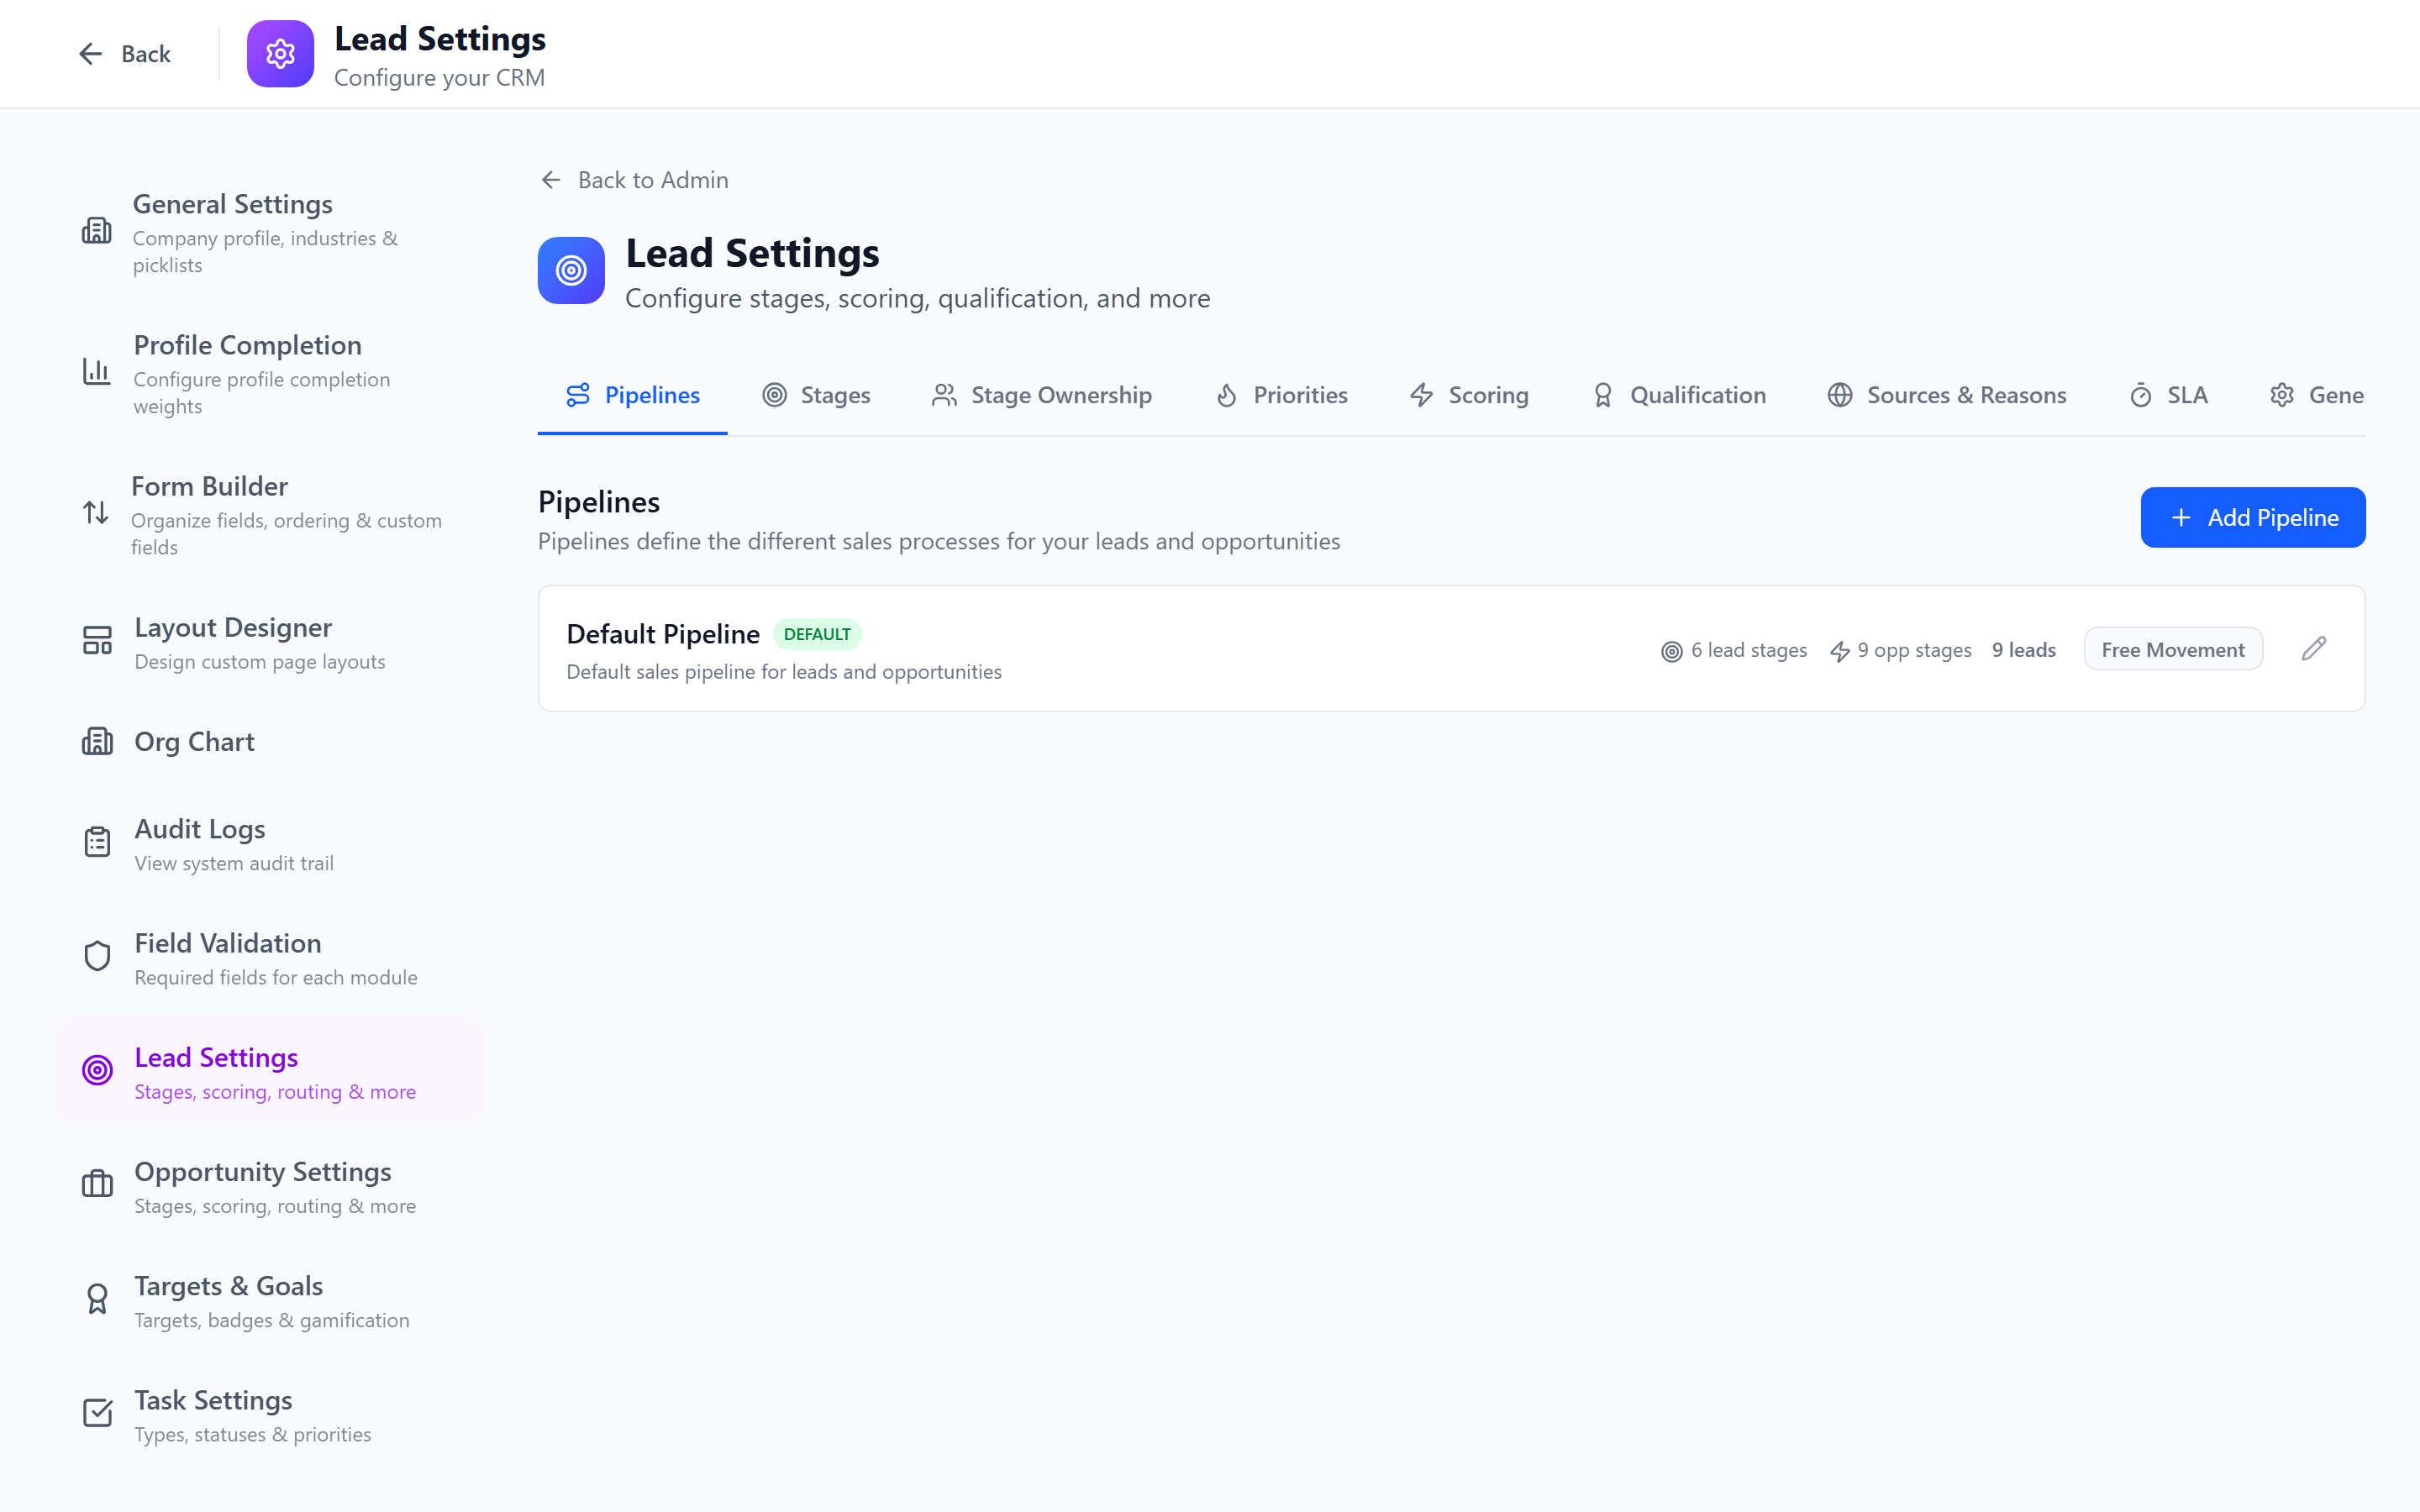
Tab Overview
| Tab | Purpose |
|---|---|
| Pipelines | Create and manage lead pipelines |
| Stages | Configure stages within pipelines |
| Priorities | Set priority levels for leads |
| Scoring | Define scoring templates and rules |
| Routing | Auto-assign rules for new leads |
| Qualification | Frameworks for qualifying leads |
| Sources & Reasons | Lead sources and disqualification reasons |
The Pipelines, Stages, and Priorities tabs are covered in their dedicated chapters: Pipelines & Stages and Priorities.
Scoring
Lead scoring assigns numeric points to leads based on their characteristics and behavior, helping sales teams focus on the most promising prospects.
Scoring Templates
A scoring template is a collection of rules that calculate a lead's score.
- Switch to the Scoring tab.
- Click Create Template.
- Enter a template name (e.g., "Enterprise Fit Score", "Engagement Score").
- Save the template.
Scoring Rules
Each template contains one or more rules that award points based on field values.
- Open a scoring template.
- Click Add Rule.
- Configure the rule:
- Category — grouping label (e.g., "Demographics", "Firmographics", "Engagement")
- Field — the lead field to evaluate (e.g., "Industry", "Company Size", "Source")
- Operator — comparison type (equals, contains, greater than, less than, in list)
- Value — the target value (e.g., "Technology", "> 500 employees")
- Points — score awarded when the rule matches (positive or negative)
- Save the rule.
Operator behaviour
The scoring engine accepts the same operator set as workflows, plus a few tweaks tuned for scoring:
| Operator | Notes |
|---|---|
equals / not_equals / contains / contains_any | Standard text checks. |
in / not_in | Now accept a multi-select value list on dropdown fields — previously only single values worked, so a rule like "industry IN (Tech, SaaS, Telco)" needed three rules; one rule now suffices. |
is_empty / is_not_empty | True when the field has no value. |
greater_than / less_than | Numeric comparison. |
older_than | Date decay — checks whether a date is older than N days. The UI now forces a numeric days input instead of accepting a free-form date string, so this operator only ever takes a positive integer. |
Standard-field dropdown population
The rule builder used to leave the value dropdown empty for industry and source fields, forcing admins to type the raw string. It now loads the live industries and sources lists from config, so picking the right value is a one-click selection.
Example Scoring Rules
| Category | Field | Operator | Value | Points |
|---|---|---|---|---|
| Firmographics | Industry | Equals | Technology | +20 |
| Firmographics | Company Size | Greater than | 500 | +15 |
| Firmographics | Company Size | Less than | 10 | -10 |
| Demographics | Job Title | Contains | VP | +25 |
| Demographics | Job Title | Contains | Intern | -15 |
| Engagement | Source | Equals | Website Demo | +30 |
| Engagement | Source | Equals | Cold List | +5 |
Use both positive and negative points. A lead from a target industry with a decision-maker title should score high, while a lead from a non-target segment with a junior title should score low.
Rule Sorting and Re-scoring
- Drag rules to change evaluation order (rules are evaluated top to bottom; all matching rules contribute points).
- Re-score All — click the "Re-score All Leads" button to recalculate scores for all existing leads using the current rules. Use this after modifying rules.
Re-scoring all leads is a bulk operation that can take time for large datasets. It runs as a background job — check Batch Jobs for progress.
Duplicate Detection
The duplicate-detection engine is rule-based, so you control exactly which fields define a duplicate for your business (it's not always just email).
- Switch to the Duplicate Detection tab.
- Define match rules — each rule is a set of fields that, when all match an existing lead, marks the new lead as a duplicate. Add multiple rules to combine strategies.
- Choose the action on match:
- Block — refuse to create the new lead.
- Flag — create the lead but tag it with
duplicate=trueand link to the original. - Allow — log the match for review but proceed normally.
- Toggle Notify owner's manager on duplicate — when a duplicate is detected, the owner's manager gets an in-app notification with both records linked so they can decide which to keep.
Example match rules:
| Rule name | Fields | Effect |
|---|---|---|
| Email match | email (case-insensitive) | Most common — a clean inbound dedupe. |
| Same person at company | email, company | Allows the same person to appear at a different company (job change). |
| Phone + company | phone, company | Catches form fills where the email differs but the person is the same. |
Duplicate detection runs on lead create (manual, API, form submit, and import) before the row is persisted.
Routing
Lead routing automatically assigns new leads to users based on configurable rules.
- Switch to the Routing tab.
- Click Add Routing Rule.
- Configure:
- Condition — field + operator + value (e.g., Source = "Website", Region = "APAC")
- Assign to — a specific user, team (round-robin), or role
- Priority — rule evaluation order (first matching rule wins)
- Save.
Routing Example
| Priority | Condition | Assign To |
|---|---|---|
| 1 | Source = "Enterprise Referral" | Enterprise Team (round-robin) |
| 2 | Region = "EMEA" | EMEA Sales Team (round-robin) |
| 3 | Company Size > 1000 | Senior Account Exec |
| 4 | Default (no conditions) | General Sales Team (round-robin) |
If no routing rules match, the lead remains unassigned. Always create a default rule (no conditions) as the last rule to catch everything.
SLA (Service Level Agreements)
Configure time-based rules that enforce first-contact deadlines for new leads.
- Switch to the SLA tab (or find SLA settings under the lead settings).
- Toggle Enable SLA to activate.
Configuration Options
| Setting | Description | Default |
|---|---|---|
| First Contact Hours | Maximum hours allowed before first contact | 4 |
| Working Hours Start | Start of business day | 09:00 |
| Working Hours End | End of business day | 18:00 |
| Working Days | Which days count as business days | Mon-Fri |
| Timezone | Timezone for working hours calculation | UTC |
| Exclude Weekends | Skip weekends in due date calculation | Yes |
Escalation
| Setting | Description | Default |
|---|---|---|
| Escalation Enabled | Escalate breached leads to managers | Yes |
| Escalation Hours | Hours after breach before escalation triggers | 8 |
Notifications
| Setting | Description |
|---|---|
| Breach Notify Owner | Notify the lead owner when SLA is breached |
| Breach Notify Manager | Notify the owner's manager on breach |
| Escalation Notify Manager | Notify manager on escalation |
| Escalation Notify Admin | Notify admins on escalation |
How SLA Due Dates Work
The system calculates the SLA due date using business hours only:
- If a lead is created at 4:00 PM on Friday with a 4-hour SLA, the deadline is 10:00 AM Monday (skipping the weekend).
- The calculation respects the configured timezone, working hours, and working days.
SLA Lifecycle
- Lead created — SLA due date is calculated and stored
- First activity logged — SLA is marked as met, response time calculated
- Deadline passes — lead is marked as breached, notifications sent
- Escalation window passes — lead is escalated, manager/admin notified
Review SLA breach rates in the dashboard. A high breach rate may indicate you need more staff or longer SLA windows.
Qualification
Qualification frameworks produce a real numeric qualification score alongside the existing rule-based Lead Score — separate engines, separate triggers, separate columns.
The numeric qualification_score + per-option score editor ship with migration 081. Run npx ts-node apps/api/src/scripts/run-tenant-migrations.ts to apply.
Built-in Frameworks
- BANT — Budget, Authority, Need, Timeline (weights default to 25/25/25/25 after migration 081)
- CHAMP — Challenges, Authority, Money, Prioritization (same default split)
- Custom — define your own
Configuring a Framework
- Switch to the Qualification tab.
- Pick the active framework (only one is active at a time; others get an Activate button).
- Each field expands inline. For each field, edit:
- Max weight — the field's contribution cap to the 100-point total.
- Per-option score — a numeric score for every dropdown / radio option, validated as
score ∈ [0, weight].
- The framework header shows a live total vs the required 100 — saving is blocked until the total balances.
- Click Recompute All on the active framework to bulk-rescore every lead in the tenant using the new option scores. Use after editing.
How Qualification Score is Calculated
When a lead is created or updated:
- The service walks every qualification field on the active framework.
- For single-select fields, it sums the matched option's score.
- For multi-select fields, it sums every matched option's score, capped at the field's
score_weight. - The total is stored in
qualification_score(and the per-field contributions inqualification_score_breakdownJSONB for the UI to render). - If the value changed, the
lead_qualification_score_changedworkflow trigger fires — independent fromlead_score_changedso each engine has its own automation hooks.
A stage change also auto-rescores qualification — so the value on the detail page never goes stale after a stage move.
Example: BANT with Per-Option Scores
| Field (weight) | Option | Score |
|---|---|---|
| Budget (25) | "Allocated > $50K" | 25 |
| "Allocated $10–50K" | 15 | |
| "Investigating" | 5 | |
| "No budget" | 0 | |
| Authority (25) | "Final decision maker" | 25 |
| "Influencer" | 15 | |
| "End user" | 5 | |
| Need (25) | "Active pain we solve" | 25 |
| "Curious" | 10 | |
| Timeline (25) | "0–30 days" | 25 |
| "30–90 days" | 15 | |
| "90+ days" | 5 |
A lead with Allocated > $50K + Final decision maker + Active pain + 0–30 days scores 100. Add a qualification threshold (e.g., 70) elsewhere in the workflow / report layer to call leads "qualified" above that bar.
Workflow Integration
The new qualification engine is wired into workflows:
- New trigger:
lead_qualification_score_changed— fires whenever the value transitions. qualification_scoreis on theupdate_fieldallowlist and the scheduled-scan filter allowlist, so rule conditions andupdate_fieldactions can target it just likescore.system-qualificationScoreis a registered system field — appears in the workflow condition picker, page designer, and other registry consumers.
See Workflow Builder for the full filter / action reference.
Sources
Manage the list of lead sources (where leads come from).
- Switch to the Sources & Reasons tab.
- In the Sources section, click Add Source.
- Enter the source name (e.g., "Website", "Referral", "Trade Show", "Cold Outreach", "LinkedIn").
- Save.
Sources appear as dropdown options on the lead create/edit form and can be used in routing rules and reports.
Disqualification Reasons
Manage reasons for disqualifying leads (marking them as not viable).
- In the Sources & Reasons tab, scroll to Disqualification Reasons.
- Click Add Reason.
- Enter the reason (e.g., "No Budget", "Not Decision Maker", "Competitor", "Wrong Industry", "Duplicate").
- Save.
When a user disqualifies a lead, they must select one of these configured reasons, ensuring consistent categorization for reporting.
Team Roles
Configure the roles available when adding team members to a lead record.
- In the Sources & Reasons tab, find the Team Roles section.
- Add roles like "Owner", "Co-Owner", "Technical Advisor", "Executive Sponsor".
- These roles appear in the record team assignment interface.
Module Settings
General key-value configuration for the leads module (e.g., default assignment behavior, auto-close inactive leads after N days).
Best Practices
- Start simple with scoring — begin with 5-10 rules and refine based on conversion data.
- Route everything — every lead should be assigned within minutes of creation.
- Use qualification consistently — train reps to score qualification criteria objectively.
- Review sources regularly — add new sources as your marketing channels evolve.
- Analyze disqualification reasons — frequent "No Budget" may indicate poor targeting.
Next: Opportunity Settings — Configure opportunity pipelines, types, and forecasting.